Things are the same ol busy around here so I thought I'd just drop in and share a little and show some projects!
We are STILL in baseball mode around here... Mitchell's team is going to playoffs and so there is practice every.single.night. of the week except Wednesday... so we are still living by the almightly baseball Gods! lol
We have been basically just hanging around and enjoying the lazy summer days... after of course we get up early to go to Morgans early workouts... which I have to admit he's only been making maybe twice a week... we must get better at that!! ha!
Wednesday nights have been our highlights.... we usually spend the "family nights" at Jens house with a potluck dinner, the kids in the pool till dark and the adults playing games and such... a FUN night for sure for all!!
Here are some random layouts and cards....
First up are a couple of
Dream Street cards featuring the Fresh Collection... check out the
Dream Street Blog this month for more projects using this collection!
 Dream Street Papers Fresh collection, Dream Street Papers Fresh rubons, Core'dinations cardstock, Storage Unit Inks & More, Basic Grey stamps, American Crafts rubons
 Dream Street Papers Fresh collection, Core'dinations cardstock, Fancy Pants stick pin, ribbon from stash, border punch from Martha Stewart, Jewels from Doodlebug, Chipboard from Tattered Angels, Storage Unit Inks & More, Cornish Heritage Farms stamps- Kim Hughes collection.
Next up is some fun projects using the oh so gorgeous
Core'dinations cardstock!!

.JPG)
Core'dinations cardstock (Black Magic, Core Essentials), Making Memories stickers, Cuttlebug embossing folders and machine, Basic Grey chipboard
 Core'dinations cardstock (Chocolate Box, Core Essentials), Doodlebug stickers, EK Success leaf punch, Martha Stewart border punch, Creative Impressions heart brads, Maya road stick pins.
To create the leaves: I folded them in half and then crumpled them a bit then I lightly sanded the front to reveal the color core, I love how these look!!
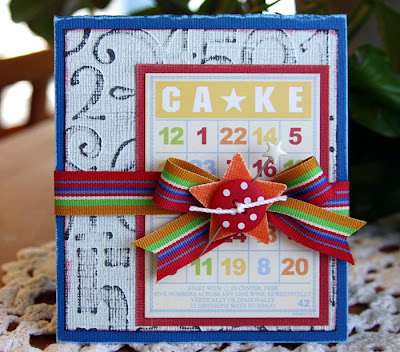
 Core'dinations Cardstock (Whitewash, Core Essentials), Jenni Bowlin bingo card, Fancy Pants stick pin, Doodlebug Button, Coats and Clark string, ribbon from craft supply, Embossing folders and machine by Cuttlebug.
Next up I finally got to play with the beautiful Noel Mignon "Rise and Shine" kit!! Here is a page I created:

.JPG) Cardstock from Core'dinations, Patterned paper: Scenic Route, Collage Press (scalloped circle), MME (orange dot), Martha Stewart border punches, Scenic Route chipboard, Making Memories ribbon, Fancy Pants stick pin, Jenni Bowlin stickers (white), Pink Paislee chipboard letters, Making Memories journaling page, Elle's Studio (etsy) date stamp, Storage Unit Inks and More ink
Cardstock from Core'dinations, Patterned paper: Scenic Route, Collage Press (scalloped circle), MME (orange dot), Martha Stewart border punches, Scenic Route chipboard, Making Memories ribbon, Fancy Pants stick pin, Jenni Bowlin stickers (white), Pink Paislee chipboard letters, Making Memories journaling page, Elle's Studio (etsy) date stamp, Storage Unit Inks and More ink
Here's a quick card based on a Jillibean Soup sketch... check out the Jillibean Soup blog for more projects using the sketch!
Core'dinations cardstock, Jillibean Soup White Bean collection, Cornish Heritage Farms stamps- Kim Hughes collection, Storage Unit Inks and More ink, Doodlebug sugar brads.
Thanks so much for stopping by!!
 Dream Street Papers Fresh collection, Dream Street Papers Fresh rubons, Core'dinations cardstock, Storage Unit Inks & More, Basic Grey stamps, American Crafts rubons
 Dream Street Papers Fresh collection, Core'dinations cardstock, Fancy Pants stick pin, ribbon from stash, border punch from Martha Stewart, Jewels from Doodlebug, Chipboard from Tattered Angels, Storage Unit Inks & More, Cornish Heritage Farms stamps- Kim Hughes collection.
.JPG)


.JPG)


4 comments:
I love them all ki - just beautiful!
this was a great post - love all your work - how did you emboss that large square on the page with you and M?
Hey Corey! Thanks for the sweet comments!
To make the lines in the cardstock I used my 12" trimmer and flipped the Core'dinations paper over and used a stylus (a bone folder would work too) and pressed it into the groove on the trimmer, then I flipped my cardstock back over (face up now) and lightly sanded the raised lines to reveal the color core, then wa-la! thanks!
Post a Comment